Wednesday, July 3, 2013

DIY Perfectly Shaped Eyebrows.


Make-up. Eyebrow Makeup. Brown Eyes

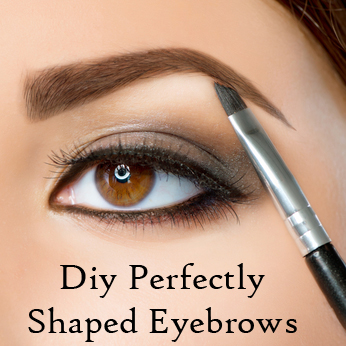
Hello girlies! Today I came across a really interesting article. I used the information and really got hooked on it.  I thought you guys would benefit from it as well. This is why-Eyebrows frame your face. In fact, you can really change up your whole look just by changing your eyebrows. Since we know that information, we know that we need to really find the right shape and style for our faces. In fact, I prefer going thick. It really brings out all your facial features. Also, it will shape your face in a way to make it appear thinner. Or if it is already thin, it will contour it naturally.

Where Your Brows Should Begin- It’s very easy to determine where your eyebrows should begin! Grab a pencil and line it from the outside part of your nose to the inner corner of your eyes. The brow should start where the pencil is lined up, the access hair on the other side of pencil should be plucked.

Get That Sexy Arch- All guys die over that arch in your eyebrow! Get guys melting over this must have arch! Use the same pencil you used to determine the beginning point of your brow and line it from the tip of your nose to the middle of your pupil. Where the tip of the pencil lies or intersects that’s where the arch should be in your brows.
 
Where Your Eyebrows Should End- Many girls get this one confused, where your eyebrows should end. It’s actually very simple to do! Use your pencil and line it from the edge of your nose to the outer corner of your eye. That is where your eyebrows should properly end.

How to Fill In Your Brows-There are many ways to fill in your eyebrows. You can either use a matte eye shadow, or you can use a pencil. Always make sure that the colors that you are using are lighter than your natural eyebrow color. I found that the easiest way to fill in your eyebrows is by using a eyebrow stencil kit. They work amazing! Elf cosmetics have a kit for only $1.00. Try it out and see for yourself!


With Love From,
Just a Girl <3

Credits to: My Fashion Chronicles

Skin Brightening Toner


Hello girlies! Well a few weeks ago I found something that I love and honestly, I wouldn't know what to do without it. It really gets down deep into your pores, and because of the citric acid really cleanses your skin. And recently, I ditched my own toner to try out something new, and the ones that were labeled 'the best' are so dang expensive! So I tried out this lemon skin brightening toner, and guess what? I loved it and I will never purchase another bottle of store carried product again!
 
Brightening Face Toner: Reduces the size of pores, brightens face, reduces inflammation, and helps with acne.


Ingredients:
  • 1/2 cup of lemon juice
  • 1 cup of water
  • 2/3 cup of witch hazel (can purchase at any drug store)
  • Plastic bottle or jar (also can purchase at any drug store)   
This recipe for those with normal to dry skin.
***For oily skin, add 2 tablespoons  of alcohol.***


Step One: Mix all ingredients together in bowl, transfer to plastic bottle or jar.


Step Two: Cleanse skin with facial cleanser and rinse. Repeat as necessary.
Step Three: Apply toner with a cotton pad. Sweep all over face, and down neck.
Step Four: Apply Moisturizer.


Benefits of This Brightening Toner:

 
Witch Hazel: Tightens pores and reduces inflammation.
Lemon Juice: Reduce blemishes and lightens skin.
Use facial toner both morning and night for a deeper cleanse, smaller pores and bright, radiant skin!
 
 
With love from,
Just a Girl <3


Tuesday, July 2, 2013

Motivation: Start Your Day Right.

You are lying in bed in a deep dream and all of a sudden you hear the dreaded noise everyone hates-the alarm clock. You have two options-Hit snooze a billion times until you are running late, or get up, get ready, and start the day fresh.

Lets be honest here. Most people don't choose the second option. And personally, neither do I. That's why, today I am going to be showing you how to start the day right. While you are reading this, you may be thinking "but girl, I don't have time for that! I'm a working mother, and I just cant fit that into my day." Here's an easy fix: All you got to do is go to sleep 20-30 minutes earlier, and then wake up that amount of time earlier each day. This way, you are not going to cut too much time out of your every day schedule, and will still feel well rested. Well, enough chit-chat, lets get on with it!

  • Set your alarm clock with about an hour until you have to be at work, or on the go.
  • Go to your kitchen and fill up a large water. Drink it.
  • Go outside-feel the fresh air. Walk your dog around the block a couple times, even better, run.
  • Do some ab crunches, or little bit of weights. Trust me, with time you will notice a difference.
  • Go back inside cut up fresh fruit and top your yogurt or cereal with it.
  • Once you have finished eating, go to your bathroom and rinse off with some warm water.
  • Choose products that make you feel happy; if you have a little extra time, shave your legs!
  • Exfoliate your face with some refreshing face wash.
  • When you get out of the water moisturize all over.
  • Once done with that, get ready for the day: Brush teeth, do hair/makeup, and get dressed.
  • If you feel accomplished, and are happy with yourself you have done good. Continue to do this everyday and watch how great it makes you feel. If you don't like how you look or feel, I want you to keep doing this, and soon enough you will.

It only takes a little bit of effort to make yourself happy. You never know what it takes until you appreciate. Trust me--This changed how I approach the day, and it will change how you do too.


*inspired by pinterest pin.